So I got in my head that I really need to go and shoot several of the really well known locations of natural wonders that we have here in Utah at least before I get told that I can't. So I headed down to Southern Utah, and tried to go to both Dead Horse Point and Arches. I had exactly 4 hours of shooting time and the following is the best of what I came away with. Enjoy.
So here are the things that I learned:
1. Don't try and shoot this much in so little time. People don't like when you tail gate them because you are racing to spot to get a good shot.
2. Moab is a cool little town. People have told me this, but I was skeptical. Lesson learned.
3. Always bring tools. My GoPro locked up on me and I didn't have an allen wrench to take it off the DJI Phantom to reset it.
4. Don't be so scared of flying. I told myself that I was willing to risk the $1,500 to get the good shots, but I held back because of my fear of the wind taking the copter.
5. Always have a good model with you for those people related shots. Or at least carry a model release so you can have strangers fill in for you.

Photo and Video equipment reviews with a little fun thrown in...
Showing posts with label Magic Lantern. Show all posts
Showing posts with label Magic Lantern. Show all posts
Sunday, November 3, 2013

Sunday, September 22, 2013
Canon 5D Mark III with Magic Lantern In-depth review
Hi all, Dave here. For a very informative and very helpful review for anyone looking at the decision to buy the Canon EOS 5D Mark III camera, watch the video.
For those that like to read, here is a summary text of the review.
Reasons why I was looking at the 5D Mark III to replace my 7D.
1. Moire and poor anti-aliasing.
2. Lens purchase decisions fork in the road (crop vs full frame)
Compared to the 7D, the 5D Mark III is better at everything, higher quality build, built for video, full HDMI out. Then came the 6D, full frame. Mega pixels, focus, no headphone jack, but GPS, Wifi, didn't have the video quality of the 5D Mark III.
Compared to 5D Mark III and the Cinema series C300, C500 to get to 4K $$$ and missing features
And then came Magic Lantern video raw...
-24fps 14bit raw video that blows away 8bit compressed video and competes with RED at least at 1080P
-Promise of even better future... MLV format, ISO less HDR video (14 stops of dynamic range), compressed RAW, Sound, stabilized features/bugs
Things I love about the 5D Mark III
Camera features:
-focus speed, FPS photos, auto-focus settings
-no aliasing, no moire,
-sensor is better, beautiful photos,
-less noise at high ISO
-600EX flash, High speed sync,
Magic Lantern features:
-video quality
-color depth 14bit amazing dynamic range ,
-focus peaking,
-zoom, mixed with 70-200 IS II L, amazing 600mm Zoomed video at F2.8
-intravalometer,
-histogram,
-scopes,
-advanced bracketing,
Things you will have to live with...
It is not perfect... yet.
- Setup/install/update of Magic Lantern not for the weak (hard to find and know the instructions are correct)
- Upgrades fixed pink frames but removed audio
- Raw video post processing steps/time (Rawanizer -> After Effects/Camera Raw-> Premiere)
- No audio sync, all separate and external (Zoom H4N)
- Sometimes flaky (video recording errors, pink frames, slow to start recording)
- 11 minutes of video per 64GB better know what you want and not waste time rolling
- Shooting Raw video in full hot sun temp issues
Is it worth it...
- Resounding YES! For the price and the quality and features, YES, you would have to spend $$$$$ on RED + accessories to get the quality with not all of the features (no photos), or double on Black Magic Cinema and get a cropped lens coverage with less features (no photos).
Accessories that you have to have:
- A video editing capable computer to process the Raw video
- Komputerbay 64GB(1000x) $120 or 256GB (1200x) $600
- CarrySpeed VF-3 (used to see live video focus peaking)
- Zoom H4N, H1, H6 (Quality sound recording)
- Tripod with a Fluid head for smooth video pans
For those that like to read, here is a summary text of the review.
Reasons why I was looking at the 5D Mark III to replace my 7D.
1. Moire and poor anti-aliasing.
2. Lens purchase decisions fork in the road (crop vs full frame)
Compared to the 7D, the 5D Mark III is better at everything, higher quality build, built for video, full HDMI out. Then came the 6D, full frame. Mega pixels, focus, no headphone jack, but GPS, Wifi, didn't have the video quality of the 5D Mark III.
Compared to 5D Mark III and the Cinema series C300, C500 to get to 4K $$$ and missing features
And then came Magic Lantern video raw...
-24fps 14bit raw video that blows away 8bit compressed video and competes with RED at least at 1080P
-Promise of even better future... MLV format, ISO less HDR video (14 stops of dynamic range), compressed RAW, Sound, stabilized features/bugs
Things I love about the 5D Mark III
Camera features:
-focus speed, FPS photos, auto-focus settings
-no aliasing, no moire,
-sensor is better, beautiful photos,
-less noise at high ISO
-600EX flash, High speed sync,
Magic Lantern features:
-video quality
-color depth 14bit amazing dynamic range ,
-focus peaking,
-zoom, mixed with 70-200 IS II L, amazing 600mm Zoomed video at F2.8
-intravalometer,
-histogram,
-scopes,
-advanced bracketing,
Things you will have to live with...
It is not perfect... yet.
- Setup/install/update of Magic Lantern not for the weak (hard to find and know the instructions are correct)
- Upgrades fixed pink frames but removed audio
- Raw video post processing steps/time (Rawanizer -> After Effects/Camera Raw-> Premiere)
- No audio sync, all separate and external (Zoom H4N)
- Sometimes flaky (video recording errors, pink frames, slow to start recording)
- 11 minutes of video per 64GB better know what you want and not waste time rolling
- Shooting Raw video in full hot sun temp issues
Is it worth it...
- Resounding YES! For the price and the quality and features, YES, you would have to spend $$$$$ on RED + accessories to get the quality with not all of the features (no photos), or double on Black Magic Cinema and get a cropped lens coverage with less features (no photos).
Accessories that you have to have:
- A video editing capable computer to process the Raw video
- Komputerbay 64GB(1000x) $120 or 256GB (1200x) $600
- CarrySpeed VF-3 (used to see live video focus peaking)
- Zoom H4N, H1, H6 (Quality sound recording)
- Tripod with a Fluid head for smooth video pans
Wednesday, September 4, 2013
Fire dancers in video raw
Hi all, I had the chance to attend the Luau at Thanksgiving Point this year. It was my first time. I gotta say, it was fun! When I got there, I was thinking that parking was going to be a nightmare. It wasn't. Smooth as silk, easy in, easy out. After parking, the line for getting in was at least a quarter mile long. I got in line thinking that I didn't even know if they were going to be sold out, or worse, run out of food. But the line moved pretty fast and I got in pretty quickly. The lines for food were fairly robust, but the cater company was keeping up nicely. I waited until most people got their food before getting mine, it gave me time to walk the gardens a bit and shoot some video.
If you haven't been to Thanksgiving Point Gardens, or if you are like me and thought that the gardens were just in back of the shops, first of all you would be wrong, and second, you really need to see this place. It is tucked away just to the north of the golf course clubhouse. It is HUGE! It will take you a couple of hours to walk around this place. There are waterfalls (and they are not tiny), streams, hills, and the flowers of every variety and breed, all manicured and on display. Seriously, you couldn't find a more amazing place hold, and to shoot, any type of event.
You see, if you take a camera into the gardens, it will cost you a photography fee of $100.00. You can bring 2 people with you but anyone beyond that has to pay $10.00. If you just want to walk around and take pictures with your iPhone, only $10.00. The luau cost $21 for entry and food. So, I figured if I was able to go to the luau, and take pictures with my equipment, I was saving myself 100 bucks. Turned out I was right. I brought everything but the quadcopter, which would have been cool... but after the latest news report of someone crashing into a crowd of people, I think it might be best to stay away from formal crowds of people.
So I shot some with the Canon 7D (16-35L II), and most of the Luau entertainment with the Canon 5D Mark III (70-200L IS II) using Magic Lantern Raw video. Take a look.
If you haven't been to Thanksgiving Point Gardens, or if you are like me and thought that the gardens were just in back of the shops, first of all you would be wrong, and second, you really need to see this place. It is tucked away just to the north of the golf course clubhouse. It is HUGE! It will take you a couple of hours to walk around this place. There are waterfalls (and they are not tiny), streams, hills, and the flowers of every variety and breed, all manicured and on display. Seriously, you couldn't find a more amazing place hold, and to shoot, any type of event.
You see, if you take a camera into the gardens, it will cost you a photography fee of $100.00. You can bring 2 people with you but anyone beyond that has to pay $10.00. If you just want to walk around and take pictures with your iPhone, only $10.00. The luau cost $21 for entry and food. So, I figured if I was able to go to the luau, and take pictures with my equipment, I was saving myself 100 bucks. Turned out I was right. I brought everything but the quadcopter, which would have been cool... but after the latest news report of someone crashing into a crowd of people, I think it might be best to stay away from formal crowds of people.
So I shot some with the Canon 7D (16-35L II), and most of the Luau entertainment with the Canon 5D Mark III (70-200L IS II) using Magic Lantern Raw video. Take a look.
Friday, August 30, 2013
Ice Hockey at Seven Peaks Ice Arena
Hi all. Yesterday I invited myself to a hockey game that my daughter's-boyfriend's-friend plays in. It is a C-league team called the Mudds. As you can probably tell I am trying to learn about shooting video and want to try and get better at it. I decided to once again shoot with the 5D Mark III, Magic Lantern Raw (of course) and the Canon 70-200 F2.8 L II lens. I gotta say, this lens never ceases to amaze. The stabilization that the lens has makes it really great for video.
So here is what I learned. Following a puck and keeping everything in focus is hard to do... and I thought football was hard! I started out really getting up-close and personal with the zoom, mostly keeping everything at F2.8 and ISO 100. I ended up, near the end of the game, shooting at F8 and ISO 1600 and keeping the zoom to a minimum. Oh, I also ended up mounting a GoPro Hero 3 above the goal to catch the action. I shot it at 1080P, 48fps, Spot metering: Off, Protune On. This is because when I merge the footage of GoPro and the Canon it looks much better to have matching frame rates. I know that people will tell you that Adobe Premiere can handle different frame rates, and it can, it just ends up skipping frames. For me, this ends up looking jerky and not good. The 48fps makes it so I can slow the action down for those really cool instant replay action shots.
I also asked the people running the place if I might be able to fly the quadcopter above a game. They said "maybe... let me get back to you", so at least it wan't an outright "no". I think I would have to have FPV googles to pull it off though. It would be fairly hard to follow the action without seeing what the camera is seeing.
Here is the video.
I also took some stills. Stills are what this camera is really meant to be able to do. And it truly does!


So here is what I learned. Following a puck and keeping everything in focus is hard to do... and I thought football was hard! I started out really getting up-close and personal with the zoom, mostly keeping everything at F2.8 and ISO 100. I ended up, near the end of the game, shooting at F8 and ISO 1600 and keeping the zoom to a minimum. Oh, I also ended up mounting a GoPro Hero 3 above the goal to catch the action. I shot it at 1080P, 48fps, Spot metering: Off, Protune On. This is because when I merge the footage of GoPro and the Canon it looks much better to have matching frame rates. I know that people will tell you that Adobe Premiere can handle different frame rates, and it can, it just ends up skipping frames. For me, this ends up looking jerky and not good. The 48fps makes it so I can slow the action down for those really cool instant replay action shots.
I also asked the people running the place if I might be able to fly the quadcopter above a game. They said "maybe... let me get back to you", so at least it wan't an outright "no". I think I would have to have FPV googles to pull it off though. It would be fairly hard to follow the action without seeing what the camera is seeing.
Here is the video.
I also took some stills. Stills are what this camera is really meant to be able to do. And it truly does!

Gooooooooaaaaaaaalllll

Pads, who needs pads.

You talking to me?

Nice save
Saturday, August 24, 2013
A little football anyone??? Lone Peak vs. Bountiful and the dynamic camera combo
Bountiful High School vs Lone Peak High School
Hello blogger readers. Today I did some testing of the Canon 5D Mark III with Magic Lantern software installed shooting a high school football game. I am going to be shooting a professional lacrosse game in a couple weeks and I wanted to test out the 70-200 F2.8 IS II mixed with high action and fast moving sports. We all know that this lens and this body are amazing at sports photography... but what about video? Can this dynamic combo really hold it's own when shooting video? Well, I think it can, but can I. Well, after looking at the footage, I need to get a lot better at controlling the focus and don't let people stand in front of me during big plays. Other than that, I am amazed what this combination can do. I'll keep trying to learn and get better to be worthy of this camera.
Congrats to the Lone Peak football team, they won 32-14!
As always, watch at 1080p... it's the gear icon, just below the video.
Congrats to the Lone Peak football team, they won 32-14!
As always, watch at 1080p... it's the gear icon, just below the video.
Here are some photos from the game...


Sunday, August 18, 2013
Wild Buffalo on Antelope Island...how close is too close?
Hey everyone. Take a look at wild buffalo on Antelope Island up-close-and-personal that I shot on Saturday. It was an amazing day. As I pulled across the causeway, the water was as still as a millpond. No wind at all. But then 3 minutes later, the wind picked up to about 40 Mph. Needless to say, I didn't get any aerial shots but I did get some amazing shots of the wildlife. There is one shot where the buffalo walked across the road about 15 feet in front of me. Didn't need a telephoto lens for that shot! Enjoy
If you want to see more, check out my Youtube channel at http://www.youtube.com/user/dbrentwatson?feature=watch for reviews, and amazing video.
If you want to see more, check out my Youtube channel at http://www.youtube.com/user/dbrentwatson?feature=watch for reviews, and amazing video.
AVP womens volleyball... fun, sun, sand, what more could you ask for?
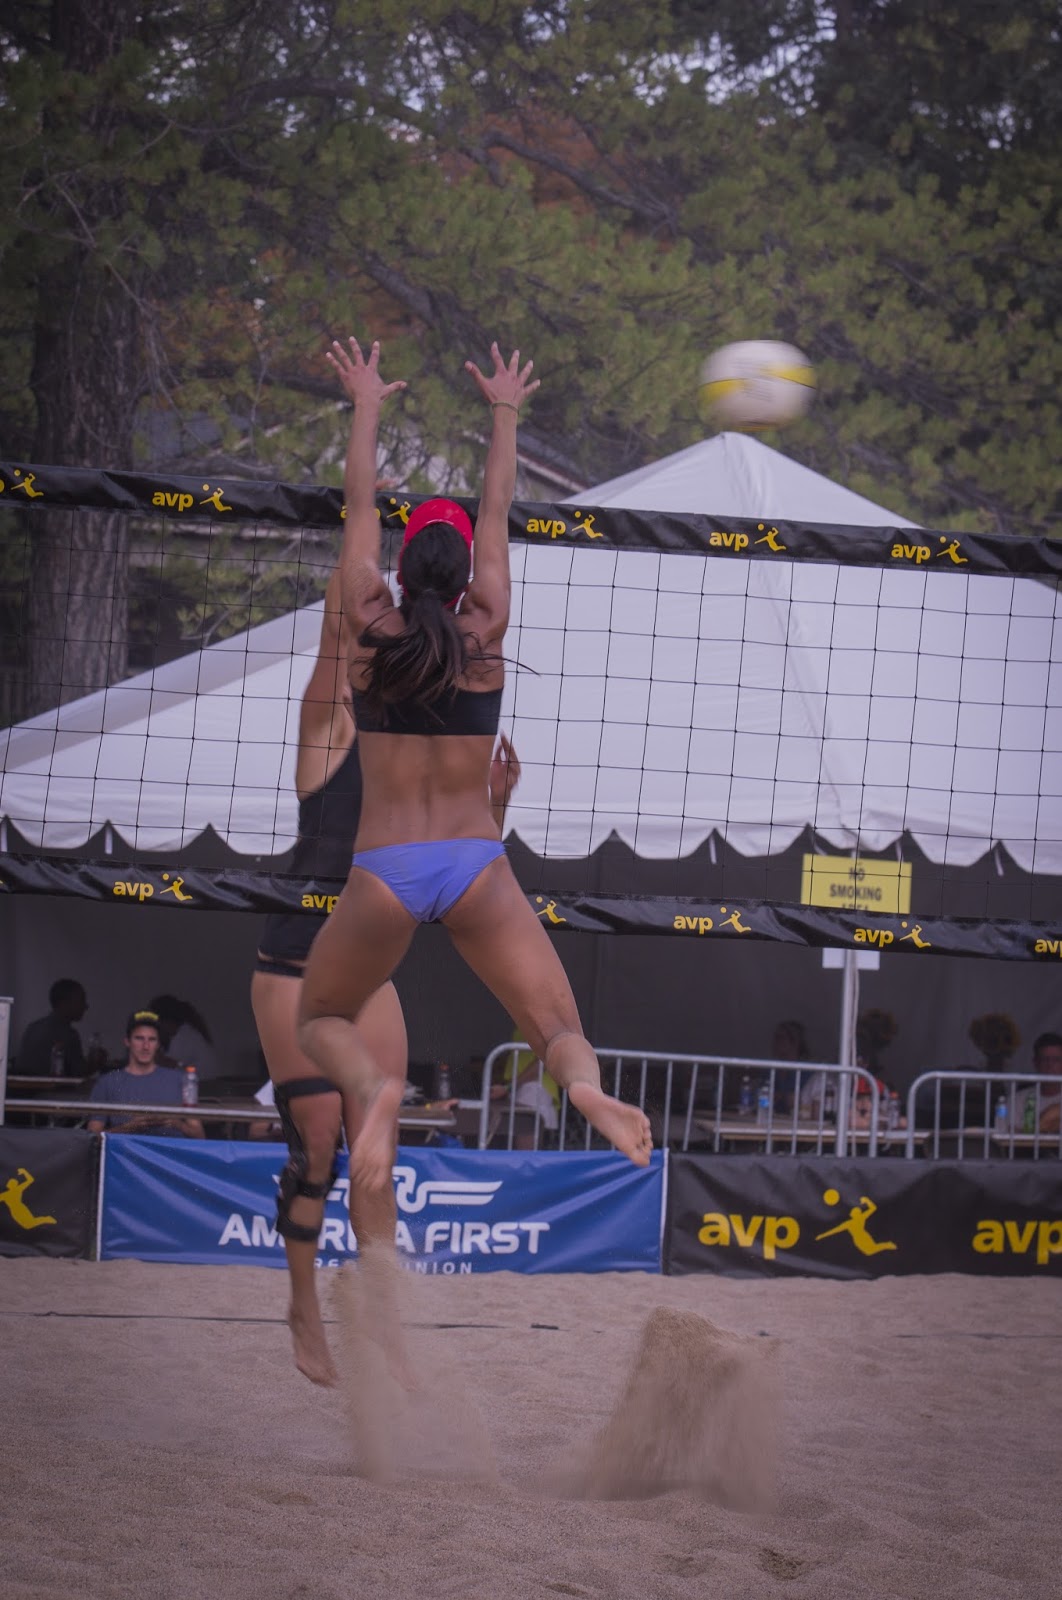
As promised, here is the video compilation of yesterday's tournament up in Liberty Park, in Salt Lake City. AVP knows how to put in all together. Up close and personal with the fans, it was quite a day of beach volleyball. Enjoy Kerri Walsh Jennings in full HD quality. Music by yours truly. ESPN and CBS Sports Channel were both doing full coverage. It was also very cool that they let everyone in with great cameras, (including myself). I saw several people with full amazing camera rigs. One guy even had a slider on a tripod. I hope everyone got some great shots! Here are mine put together in a nice package.
For more videos, subscribe, if you like.
Thanks to A Palmer for the beautiful 70-200 F2.8 II lens that he let me borrow.
For more videos, subscribe, if you like.
Thanks to A Palmer for the beautiful 70-200 F2.8 II lens that he let me borrow.
Saturday, August 17, 2013
AVP womens volleyball semi-finals in SLC
So I saw the news last night about how some local women got to take on Kerri Walsh Jennings. For those of you who don't know Kerri, she was half of the Misty May and Kerri Walsh Jennings duo from the summer Olympics. Together they have won gold in 3 Olympics. So today, I stopped by Liberty Park in SLC to check out a few matches. Amazing play.
So here are a few shots from the games that were played.


 Some beautiful RAW video to follow!
So here are a few shots from the games that were played.




If you like it, share it!
Friday, August 16, 2013
Where to shoot photos in American Fork
There is a little known secret about this amazing hidden park here in American Fork. Surrounded by trees, you can't really see it from any road, but step inside and you will find one of the most amazing locations for shooting portraits and video. You have colorful rocks and stairs in the amphitheater, and then flowers and hills that make this place large enough for a huge wedding, and small enough to feel intimately close to nature. Just up the hill (as you will see in the video) is the American Fork LDS Temple. Enjoy some amazing flowers video and hidden gems in the park.
Shot with Canon 5D Mark III
Magic Lantern Firmware July 27, 2013 build
Canon 24-70 F2.8 L
ProAm DVC200 8 ft Camera Jib
Music by David Watson
Shot with Canon 5D Mark III
Magic Lantern Firmware July 27, 2013 build
Canon 24-70 F2.8 L
ProAm DVC200 8 ft Camera Jib
Music by David Watson
Thursday, August 15, 2013
HD Video of flying over Main Street Park City Utah...
Hi all. Over the weekend I headed up to Park City, a high class mountain town here in Utah. Park City is mostly known for the Sundance Film festival, It is where all the movies stars come to debut their indie film works or just party with those who do. It's a beautiful place in winter and in summer. Here is some of the video, shot with the DJI Phantom Quadcopter and the Canon 5D Mark III, Raw. Enjoy.
Music by David Watson
This time out I was more nervous flying than I have every been thus far. The reason I think is because I have been kicked out of many places (i.e. Temple grounds, Football fields, Shopping centers) and there happen to be a cop just down the street that was blocking traffic while they cleaned up a street festival down the road. But, to my amazement, no one kicked me out, in fact, there were really just lots of people oooing and awing over the spectacle of the quadcopter.
This thing is a young boys and old men magnet. I kid you not, if anyone is near, they flock to it like nothing else. Young boys always ask 2 questions; "Where did you get that?" and "Can I fly it?" Old men ask; "What is that called?" and "Does it have a camera?"
I have made a lot of friends and contacts by just flying. It is a lot of fun. Send me a comment and tell me what you think.
Music by David Watson
This time out I was more nervous flying than I have every been thus far. The reason I think is because I have been kicked out of many places (i.e. Temple grounds, Football fields, Shopping centers) and there happen to be a cop just down the street that was blocking traffic while they cleaned up a street festival down the road. But, to my amazement, no one kicked me out, in fact, there were really just lots of people oooing and awing over the spectacle of the quadcopter.
This thing is a young boys and old men magnet. I kid you not, if anyone is near, they flock to it like nothing else. Young boys always ask 2 questions; "Where did you get that?" and "Can I fly it?" Old men ask; "What is that called?" and "Does it have a camera?"
I have made a lot of friends and contacts by just flying. It is a lot of fun. Send me a comment and tell me what you think.
Sunday, August 11, 2013
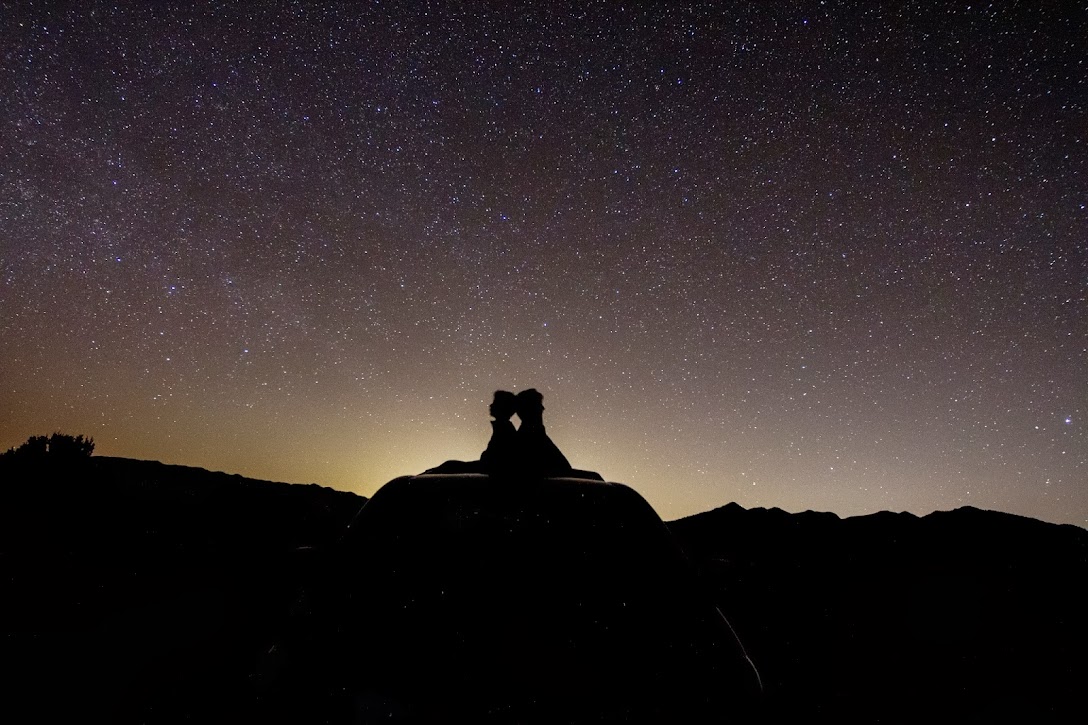
How to shoot the Milky way in a time-lapse, it's harder and easier than you think
Hi everyone. I searched and search the internet for good information about how to shoot a time lapse of the milky way, surprisingly, I didn't find a whole lot of useful information. Sure people are willing to share the settings on the camera, but to find the secrets of where to shoot, and how to shoot.
The next thing to check is the weather, check it here. Make sure you check the cloud cover and the movement of the clouds at least a few hours before you go out somewhere. You need the sky to be clear and you also need to know how much wind. The reason for this is not only clouds, but the wind can kick up a lot of dust. If there is a storm front coming in, chances are pretty good that along with that storm will kick up dust.
Ever here of light pollution? Most of the time, if you live near any sort of city, you are going to have light pollution. This is caused by all the lights that we keep on at night that end up reflecting and bouncing all over the place. To find a place near you that has a dark enough sky, search here.
Ok, now we need to talk about equipment. You need a camera, preferably a DSLR, with the ability to shoot long exposures. How long? 10-30 seconds. Most DSLR cameras can shoot up to 30 second shots in any mode. You also need a wide angle lens. The reason for this is because stars move. If you zoom into a part of the sky, that smaller location will move more than looking at a whole lot of the sky with a wide angle lens. You need a tripod and it needs to be stable. The next thing is a intervalometer. This is a device that will take a series of pictures at a specific interval. I use Magic Lantern firmware which puts this capability in the camera.
That's it really. There are lots of other equipment that can be used, but you don't need those things to take a good timelapse.
So I followed the steps above and this is location that I came up with:

It was far enough away to get out of most of the light pollution for my area and away from any traffic and close enough to drive within a couple hours. The moon rise was 10:00 am so I didn't have to worry about the moon getting in the way, and the weather was mostly clear. Because this is a timing thing that only happens every once in a while, I was willing to risk having a few scattered clouds.
I set the camera up, pointed at the horizon, and manually focus the camera. Focus can be the most tricky part of setting up. I usually end up turning on video mode, or live preview, and then pointing the camera at a star that is bright, and then manually adjusting focus so that the star is focused. You may have to increase the ISO settings to above 3200 in order to really have the camera be able to "see" the stars. If the stars are not bright enough, then you may have to resort to pointing at a man made light out in the distance to set the focus.
Next thing to setup is you camera settings. Here are the ranges that you will want to test with:
Camera Manual mode
Lens: Turn off Autofocus
Lens width: 11mm - 24mm (depends on crop or full frame camera)
ISO: 1600-6400
Shutter speed: 10-30 seconds
Aperture: F2.8 - F5.6
Intervalometer: Every 1-10 seconds (depends on how fast the shutter speed is)
Set the picture style to Faithful
Set the White Balance to 3200 K. Do not leave it on Auto White Balance.
So take some test shots. Keep the ISO as low as you can, but capture as much light as you possibly can. Try ISO at 1600, Shutter speed at 25 seconds. In the camera preview mode, just remember that in really dark environments that the screen will look a lot brighter than the actual photo (or video frame).
Obviously keeping the camera still is assumed. If you have a lot of wind, you may want to make sure that you tripod is sufficiently weighted down to resist any movement.
That's it for the shooting part. In my next blog post I will go over how to process the frames into a video.
My guide to shooting night time time-lapse
There are several things that have to come together before you try to go out and shoot. The first is the phase of the moon. You need the moon to not be out. You can check the sunrise and sunset of the moon by your location at this site.The next thing to check is the weather, check it here. Make sure you check the cloud cover and the movement of the clouds at least a few hours before you go out somewhere. You need the sky to be clear and you also need to know how much wind. The reason for this is not only clouds, but the wind can kick up a lot of dust. If there is a storm front coming in, chances are pretty good that along with that storm will kick up dust.
Ever here of light pollution? Most of the time, if you live near any sort of city, you are going to have light pollution. This is caused by all the lights that we keep on at night that end up reflecting and bouncing all over the place. To find a place near you that has a dark enough sky, search here.
Ok, now we need to talk about equipment. You need a camera, preferably a DSLR, with the ability to shoot long exposures. How long? 10-30 seconds. Most DSLR cameras can shoot up to 30 second shots in any mode. You also need a wide angle lens. The reason for this is because stars move. If you zoom into a part of the sky, that smaller location will move more than looking at a whole lot of the sky with a wide angle lens. You need a tripod and it needs to be stable. The next thing is a intervalometer. This is a device that will take a series of pictures at a specific interval. I use Magic Lantern firmware which puts this capability in the camera.
That's it really. There are lots of other equipment that can be used, but you don't need those things to take a good timelapse.
So I followed the steps above and this is location that I came up with:

It was far enough away to get out of most of the light pollution for my area and away from any traffic and close enough to drive within a couple hours. The moon rise was 10:00 am so I didn't have to worry about the moon getting in the way, and the weather was mostly clear. Because this is a timing thing that only happens every once in a while, I was willing to risk having a few scattered clouds.
Setting up
You need to find a location that has some amount of the earth in the shot. You need this because without reference to something on the ground, it is hard for anyone watching to really see the amount of movement that is going on. Also, because you are going to be shooting at a large aperture value (i.e. 2.8), you need to make sure that anything that is closer to you (like trees or bushes), isn't so close that you lose focus on the stars because of the depth of field. Some of the more advanced shooters will increase the F-stop to allow for a larger depth-of-field to allow for this very thing. You will then have to either increase the ISO, of increase the shutter speed to account for this.I set the camera up, pointed at the horizon, and manually focus the camera. Focus can be the most tricky part of setting up. I usually end up turning on video mode, or live preview, and then pointing the camera at a star that is bright, and then manually adjusting focus so that the star is focused. You may have to increase the ISO settings to above 3200 in order to really have the camera be able to "see" the stars. If the stars are not bright enough, then you may have to resort to pointing at a man made light out in the distance to set the focus.
Next thing to setup is you camera settings. Here are the ranges that you will want to test with:
Camera Manual mode
Lens: Turn off Autofocus
Lens width: 11mm - 24mm (depends on crop or full frame camera)
ISO: 1600-6400
Shutter speed: 10-30 seconds
Aperture: F2.8 - F5.6
Intervalometer: Every 1-10 seconds (depends on how fast the shutter speed is)
Set the picture style to Faithful
Set the White Balance to 3200 K. Do not leave it on Auto White Balance.
So take some test shots. Keep the ISO as low as you can, but capture as much light as you possibly can. Try ISO at 1600, Shutter speed at 25 seconds. In the camera preview mode, just remember that in really dark environments that the screen will look a lot brighter than the actual photo (or video frame).
Taking the sequence of shots
So now set the Intervalometer to take a picture every (shutter speed) + 1 second. The length of the video will depend on how many shots you take. Remember that every frame is only 1/24th or 1/30th of a second in video. So for a 10 second video, you need 240 shots. If you are taking 2 shots a minute, you need to shoot roughly 2 hours worth of shots. This also may depend on the capabilities of your camera, but most should be able to handle it. If you are using Magic Lantern on a Canon camera, this will work. I have tried using long exposure noise reduction and because it take quite a bit of time to process each frame in camera, I don't recommend it. You can do better noise reduction in post.
Obviously keeping the camera still is assumed. If you have a lot of wind, you may want to make sure that you tripod is sufficiently weighted down to resist any movement.
That's it for the shooting part. In my next blog post I will go over how to process the frames into a video.
Tuesday, August 6, 2013
American Fork Steel Days - Parade and Festivities
Monday, August 5, 2013
Cascade Springs - Utah Mountains Video Shoot
I spent last Friday shooting the beautiful mountains of Utah. Traveling up American Fork Canyon, over the Alpine Loop, there are a couple of amazing reservoirs and an amazing mountain spring called Cascade Springs. If you are ever in the area, you should visit here. You can also stop by the famous Sundance Ski Resort for some fine dinning any time of year. Enjoy.
I shot with my Canon 5D Mark III, with Magic Lantern Video RAW. The dynamic range is amazing! Should have brought my variable ND filter along to slow some of the water shots but otherwise it was very exciting.
I shot with my Canon 5D Mark III, with Magic Lantern Video RAW. The dynamic range is amazing! Should have brought my variable ND filter along to slow some of the water shots but otherwise it was very exciting.
Tuesday, July 9, 2013
Canon 7D in-depth review
So you are thinking about buying Canon 7D?

Reasons that I thought about buying…
Canon is a strong brand. I had a Canon film camera and I also bought a Canon T2i (now upgraded to a T3i) years ago when I got back into shooting. I had friends who got the Canon 5D Mark II (now upgraded to a Mark III) and I wanted one. The things that were really important to me were the mega pixels, and the ability to shoot video. The pictures per second, the crop factor…although there were benefits, I didn't really understand them fully at the time. I also knew that the camera needed good lenses, and I couldn't afford both the 5D and some good lenses. I knew that I wanted high quality glass, probably a 24-70 2.8 and a 50mm 1.4. My main focus was going to be shooting stock photography of common things. I knew that I wanted to shoot some landscapes and shoot portraits. For video I also wanted to shoot stock video of locations and people. And of course, I wanted to capture all the school activities and cheerleading of my girls.
Here is what I actually use it for.....
I started down the path of shooting stock photos. After getting into it, and shooting several things, I found that there are a lot of rules about shooting stock photos. And this is a club that other photographers do not necessarily want new members. This is pretty typical though. I shot outdoor landscapes and took it to shoot cheer competitions. I had shot with a Sony HD Camcorder in the past which always left me frustrated with the quality of the picture. I bought the Canon 50mm 1.4 lens first, thinking that the light sensitivity would allow me to get more great shots even in poor indoor lighting. The camera with this lens, performed really well in low light, but shooting outdoor landscapes with a lot of light did not give me the flexibility that I thought it would. And the inside cheerleading shots, while much higher quality than the Sony, forced me to have to pan back and forth even when sitting at the very top of the bleachers. I think the biggest problem for me, even now with DSLR shooting is focus. Getting focus to happen fast and accurate is an art form. It takes lots of practice and you need the right tools that I didn't originally have at the time. I have taken a lot of photos as well. I have used the on-camera flash for some of them. I liked the fact that this camera had a flash for those moments that you want to treat it like a point and shoot. Since I was determined to make good photos and good videos, the cheaper price on the camera allowed me to add more things to it later on. And with the firmware update that was released, some of the audio missing features are significantly better now. I have shot a lot with this camera. It has performed well even in extreme conditions. I have shot in brutal Utah cold, humid Oregon coast, hot southern Utah. I have never dropped it in water, unlike the zoom audio recorder and a flash, but it has gotten slightly wet at times.
Here are the things I didn't expect or didn't like...
The crop factor of the camera with the 50mm lens was narrow. I hadn't done the math to realize that 50mm meant it was really a 80mm lens. I didn't realize how much I would have to move back to shoot any people or things. Don't buy a fixed lens for your first lens. A lot of people really like the 28-104 f4. I bought a 24-70 2.8. It has been a great lens. Shooting photos in almost any condition with the a lens like this is great.
It took a lot of work to figure out how to best focus. If you get used to looking through the viewfinder with photos and setting focus, when you are in video mode, the viewfinder is obviously blocked by the mirror so you have to use the video screen to check focus. Doing this is almost impossible without digitally zooming in. Which means following and changing focus is impossible without adding other viewfinders or bigger screens, or magic lantern firmware on. There is no autofocus while recording unless you like your video to look weird while the lens searches for focus in the middle of a shot.
The on-camera mic is not bad if you don't care about quality audio. If you do care, you are going to have to get some sort of mic, or mic's to go with the camera. The AGC, or Automatic Gain Control, tries to get the most signal and compresses the sound to raise it to a level without clipping. For someone who just wants to shoot without worrying about the audio, this feature can come in handy. For someone who wants to get the best quality audio possible, not so much. If you upgrade to a mic, you will hear the difference.
One of the features that this camera has is micro focus adjustments. I found that my 24-70 lens wasn't tack sharp in a lot of my photos. At first I thought maybe it was camera shake or just me doing something wrong. After much research, I found that some combinations of cameras and lenses can be off just a bit when focusing. I used this feature to have the camera recognize this lens and automatically adjust the tiny amount required to get accurate focus. If you are going to be using lots of different lenses, this is a very helpful feature.
Moire patterns are something that I didn't really understand in video. Wow, do they become bad news. I shot a training video where I had a shirt with horizontal stripes. I was shocked when every subtle movement became a huge distraction. I went to my friend Google to find an answer. Turns out the only answer is to blur the crap out of the video - kinda pointless if you are trying for something sharp. Problem is, you don't really have any control of them, it's because of the sensor.
Here are the super cool things that I love about it...
If you are going to get serious about shooting video or photos with a DSLR, you can't go very wrong with any of the Canon's. While some have more features to enable you to extend things even further into some creative areas, the thing I have enjoyed about the 7D is it's modularity. I have been able to get into slowed waterfall types of shots, astrophotography, HDR photos, night time video, wireless audio, sports photography and sports video, multiple flash types and sizes for all types of shooting,.. the list goes on and on. The lenses that are available hit every price point and every feature. And glass doesn't lose value. There will always be upgrades, and more features that everyone has to have, if you can afford it. For me, this has been a great camera and a great bunch of shots.
Common Settings that I use and will add on to later videos
Picture Styles
AEB HDR photos
Audio Manual settings
Max ISO settings High noise reduction
Video record settings

Reasons that I thought about buying…
Canon is a strong brand. I had a Canon film camera and I also bought a Canon T2i (now upgraded to a T3i) years ago when I got back into shooting. I had friends who got the Canon 5D Mark II (now upgraded to a Mark III) and I wanted one. The things that were really important to me were the mega pixels, and the ability to shoot video. The pictures per second, the crop factor…although there were benefits, I didn't really understand them fully at the time. I also knew that the camera needed good lenses, and I couldn't afford both the 5D and some good lenses. I knew that I wanted high quality glass, probably a 24-70 2.8 and a 50mm 1.4. My main focus was going to be shooting stock photography of common things. I knew that I wanted to shoot some landscapes and shoot portraits. For video I also wanted to shoot stock video of locations and people. And of course, I wanted to capture all the school activities and cheerleading of my girls.
Here is what I actually use it for.....
I started down the path of shooting stock photos. After getting into it, and shooting several things, I found that there are a lot of rules about shooting stock photos. And this is a club that other photographers do not necessarily want new members. This is pretty typical though. I shot outdoor landscapes and took it to shoot cheer competitions. I had shot with a Sony HD Camcorder in the past which always left me frustrated with the quality of the picture. I bought the Canon 50mm 1.4 lens first, thinking that the light sensitivity would allow me to get more great shots even in poor indoor lighting. The camera with this lens, performed really well in low light, but shooting outdoor landscapes with a lot of light did not give me the flexibility that I thought it would. And the inside cheerleading shots, while much higher quality than the Sony, forced me to have to pan back and forth even when sitting at the very top of the bleachers. I think the biggest problem for me, even now with DSLR shooting is focus. Getting focus to happen fast and accurate is an art form. It takes lots of practice and you need the right tools that I didn't originally have at the time. I have taken a lot of photos as well. I have used the on-camera flash for some of them. I liked the fact that this camera had a flash for those moments that you want to treat it like a point and shoot. Since I was determined to make good photos and good videos, the cheaper price on the camera allowed me to add more things to it later on. And with the firmware update that was released, some of the audio missing features are significantly better now. I have shot a lot with this camera. It has performed well even in extreme conditions. I have shot in brutal Utah cold, humid Oregon coast, hot southern Utah. I have never dropped it in water, unlike the zoom audio recorder and a flash, but it has gotten slightly wet at times.


Here are the things I didn't expect or didn't like...
The crop factor of the camera with the 50mm lens was narrow. I hadn't done the math to realize that 50mm meant it was really a 80mm lens. I didn't realize how much I would have to move back to shoot any people or things. Don't buy a fixed lens for your first lens. A lot of people really like the 28-104 f4. I bought a 24-70 2.8. It has been a great lens. Shooting photos in almost any condition with the a lens like this is great.
It took a lot of work to figure out how to best focus. If you get used to looking through the viewfinder with photos and setting focus, when you are in video mode, the viewfinder is obviously blocked by the mirror so you have to use the video screen to check focus. Doing this is almost impossible without digitally zooming in. Which means following and changing focus is impossible without adding other viewfinders or bigger screens, or magic lantern firmware on. There is no autofocus while recording unless you like your video to look weird while the lens searches for focus in the middle of a shot.
The on-camera mic is not bad if you don't care about quality audio. If you do care, you are going to have to get some sort of mic, or mic's to go with the camera. The AGC, or Automatic Gain Control, tries to get the most signal and compresses the sound to raise it to a level without clipping. For someone who just wants to shoot without worrying about the audio, this feature can come in handy. For someone who wants to get the best quality audio possible, not so much. If you upgrade to a mic, you will hear the difference.
One of the features that this camera has is micro focus adjustments. I found that my 24-70 lens wasn't tack sharp in a lot of my photos. At first I thought maybe it was camera shake or just me doing something wrong. After much research, I found that some combinations of cameras and lenses can be off just a bit when focusing. I used this feature to have the camera recognize this lens and automatically adjust the tiny amount required to get accurate focus. If you are going to be using lots of different lenses, this is a very helpful feature.
Moire patterns are something that I didn't really understand in video. Wow, do they become bad news. I shot a training video where I had a shirt with horizontal stripes. I was shocked when every subtle movement became a huge distraction. I went to my friend Google to find an answer. Turns out the only answer is to blur the crap out of the video - kinda pointless if you are trying for something sharp. Problem is, you don't really have any control of them, it's because of the sensor.
Here are the super cool things that I love about it...
If you are going to get serious about shooting video or photos with a DSLR, you can't go very wrong with any of the Canon's. While some have more features to enable you to extend things even further into some creative areas, the thing I have enjoyed about the 7D is it's modularity. I have been able to get into slowed waterfall types of shots, astrophotography, HDR photos, night time video, wireless audio, sports photography and sports video, multiple flash types and sizes for all types of shooting,.. the list goes on and on. The lenses that are available hit every price point and every feature. And glass doesn't lose value. There will always be upgrades, and more features that everyone has to have, if you can afford it. For me, this has been a great camera and a great bunch of shots.


Common Settings that I use and will add on to later videos
Picture Styles
AEB HDR photos
Audio Manual settings
Max ISO settings High noise reduction
Video record settings
Monday, July 8, 2013
Reviews... where to start??
So I put together the long list of equipment that I have purchased over the years... and it is substantial. I got back into photography and videography as a way to capture the fun things that my kids were into. My son has become the guitar player that I always wished I could become and my daughters are into cheerleading mostly. Both my daughters are excellent cheerleaders. My second daughter, switched it up by getting very interested in playing violin.
I also found myself needing to produce training videos for work. I have always been into producing music, so the idea of taking audio production to another level, mixed with video, seemed compelling. So I have spent a lot of time watching, learning, growing and then producing videos. Of the equipment that I have chosen to procure, having a camera and lens that allowed me to capture the scenes was probably the most important purchase I have made. So I am going to start there.
Here is a list of equipment that I am going to review. Leave me a comment if anything of the things here you would like to hear more about first.
Main components
Canon 7D
Canon 5D Mark III
Zoom H4N
Canon Lenses - 24-70mm 2.8 L, 16-35mm 2.8 II L, 50mm 1.4
ePhotoinc Video light kit + Greenscreen backdrop
60 LED on camera video light
iPad split beam glass teleprompter
GoPro Hero 3 Black
DSLR Camera Jib/Crane
Handheld DSLR Stabilizer
Video "super" Computer
Software
Adobe Premiere CC
Adobe AfterEffects CC
Davinci Resolve (lite)
Aerial Videography
DJI Phantom Quadcopter
DJI Zenmuse gimbal for Phantom (coming soon)
I also found myself needing to produce training videos for work. I have always been into producing music, so the idea of taking audio production to another level, mixed with video, seemed compelling. So I have spent a lot of time watching, learning, growing and then producing videos. Of the equipment that I have chosen to procure, having a camera and lens that allowed me to capture the scenes was probably the most important purchase I have made. So I am going to start there.
Here is a list of equipment that I am going to review. Leave me a comment if anything of the things here you would like to hear more about first.
Main components
Canon 7D
Canon 5D Mark III
Zoom H4N
Canon Lenses - 24-70mm 2.8 L, 16-35mm 2.8 II L, 50mm 1.4
ePhotoinc Video light kit + Greenscreen backdrop
60 LED on camera video light
iPad split beam glass teleprompter
GoPro Hero 3 Black
DSLR Camera Jib/Crane
Handheld DSLR Stabilizer
Video "super" Computer
Software
Adobe Premiere CC
Adobe AfterEffects CC
Davinci Resolve (lite)
Aerial Videography
DJI Phantom Quadcopter
DJI Zenmuse gimbal for Phantom (coming soon)
Practicing for the DJI Innovation Zenmuse
July 4th, time for everyone to take off work, spend time with family, and celebrate. A few weeks back, I pre-ordered the DJI Innovations Zenmuse H3-2D gimbal for the Phantom. I was hoping to be able to shoot some of the festivities on the 4th. Well, to my dismay, I found out I am in the second or third shipment on Monday, so the fourth was definitely out. Oh well, better luck next time. I decided that I was going to shoot all the same and learn as much as I could, even though some of the shots may not be up to my own standards.
So I headed down to the Freedom Festival hot air balloon launch early morning on the fourth. I took every bit of equipment that I could carry. Alas, no launch today. Turns out launching balloons in potentially wet, windy and lighting is probably not a good idea. So I had 3 fully charged Phantom Batteries and no place to shoot.
So I decided to go and practice shooting some of the other shots that I have been waiting for the gimbal to shoot. To the temple!! It was almost midday by now, and the sun was getting pretty hot, not necessarily a bad time to shoot with the GoPro. I have found that if you are angling the shot down and the sun is directly above, you can usually avoid the lens flare and reflections of light that get in the way. Wasn't quite directly above so I did catch quite a bit of light in the lens.
So the shot challenge that I was looking to accomplish is to fly toward the temple at ground level, and as I approach the building, fly up the building, and get up to Moroni (the guy at the top of most Mormon temples) and then circle around and back down. Check out the video to see how I did.
Then, that night, we went down to the Freedom Festival fireworks. This time I tried out the new 5D Mark III Raw Video capabilities using Magic Lantern, (June 27 build). Check out the video below.
Subscribe to:
Posts (Atom)