So I got in my head that I really need to go and shoot several of the really well known locations of natural wonders that we have here in Utah at least before I get told that I can't. So I headed down to Southern Utah, and tried to go to both Dead Horse Point and Arches. I had exactly 4 hours of shooting time and the following is the best of what I came away with. Enjoy.
So here are the things that I learned:
1. Don't try and shoot this much in so little time. People don't like when you tail gate them because you are racing to spot to get a good shot.
2. Moab is a cool little town. People have told me this, but I was skeptical. Lesson learned.
3. Always bring tools. My GoPro locked up on me and I didn't have an allen wrench to take it off the DJI Phantom to reset it.
4. Don't be so scared of flying. I told myself that I was willing to risk the $1,500 to get the good shots, but I held back because of my fear of the wind taking the copter.
5. Always have a good model with you for those people related shots. Or at least carry a model release so you can have strangers fill in for you.
Photo and Video equipment reviews with a little fun thrown in...
Showing posts with label DSLR. Show all posts
Showing posts with label DSLR. Show all posts
Sunday, November 3, 2013
Sunday, September 22, 2013
Canon 5D Mark III with Magic Lantern In-depth review
Hi all, Dave here. For a very informative and very helpful review for anyone looking at the decision to buy the Canon EOS 5D Mark III camera, watch the video.
For those that like to read, here is a summary text of the review.
Reasons why I was looking at the 5D Mark III to replace my 7D.
1. Moire and poor anti-aliasing.
2. Lens purchase decisions fork in the road (crop vs full frame)
Compared to the 7D, the 5D Mark III is better at everything, higher quality build, built for video, full HDMI out. Then came the 6D, full frame. Mega pixels, focus, no headphone jack, but GPS, Wifi, didn't have the video quality of the 5D Mark III.
Compared to 5D Mark III and the Cinema series C300, C500 to get to 4K $$$ and missing features
And then came Magic Lantern video raw...
-24fps 14bit raw video that blows away 8bit compressed video and competes with RED at least at 1080P
-Promise of even better future... MLV format, ISO less HDR video (14 stops of dynamic range), compressed RAW, Sound, stabilized features/bugs
Things I love about the 5D Mark III
Camera features:
-focus speed, FPS photos, auto-focus settings
-no aliasing, no moire,
-sensor is better, beautiful photos,
-less noise at high ISO
-600EX flash, High speed sync,
Magic Lantern features:
-video quality
-color depth 14bit amazing dynamic range ,
-focus peaking,
-zoom, mixed with 70-200 IS II L, amazing 600mm Zoomed video at F2.8
-intravalometer,
-histogram,
-scopes,
-advanced bracketing,
Things you will have to live with...
It is not perfect... yet.
- Setup/install/update of Magic Lantern not for the weak (hard to find and know the instructions are correct)
- Upgrades fixed pink frames but removed audio
- Raw video post processing steps/time (Rawanizer -> After Effects/Camera Raw-> Premiere)
- No audio sync, all separate and external (Zoom H4N)
- Sometimes flaky (video recording errors, pink frames, slow to start recording)
- 11 minutes of video per 64GB better know what you want and not waste time rolling
- Shooting Raw video in full hot sun temp issues
Is it worth it...
- Resounding YES! For the price and the quality and features, YES, you would have to spend $$$$$ on RED + accessories to get the quality with not all of the features (no photos), or double on Black Magic Cinema and get a cropped lens coverage with less features (no photos).
Accessories that you have to have:
- A video editing capable computer to process the Raw video
- Komputerbay 64GB(1000x) $120 or 256GB (1200x) $600
- CarrySpeed VF-3 (used to see live video focus peaking)
- Zoom H4N, H1, H6 (Quality sound recording)
- Tripod with a Fluid head for smooth video pans
Sunday, September 1, 2013
Wild Tarantula crossing... up close and personal
So another day out looking for amazing video... Today's venture took me to the west side of Utah Lake. A long stretch of two lane highway with shooting ranges and beautiful views of the mountains all around. I haven't been out there since I use to ride my bullet bike at speeds faster than I should have. The weather was stormy, but not a bit of wind. Perfect conditions to fly the DJI Phantom quadcopter. I flew around for while, trying to capture some the beautiful light that was shooting through the clouds. Got some footage.
It wasn't until the ride back that things got interesting. It was about 7'oclock when I saw something on the road from quite a distance. As I came by and passed it, I realized that this thing was a big tarantula! I flipped my car around and drove back to find this guy hanging out in the middle of the road. I grabbed the camera and went to get up close and personal with him. I realized that this guy was not going to move, despite the danger of staying in the road. I grabbed a stick and helped him along to get out of harms way. Luckily all the cars that passed stayed out of the lane and he safely made it to the other side. I got back in my car and started driving home again. I wasn't another mile later that I saw yet another one! I decided that I wouldn't go back this time and kept going. Another 1/2 mile, and another one and this one was even bigger than the last two. I stopped and got the camera, and the tripod and got right up in this ones face. Wow, what a face. These creatures are amazing. They are so tall when they stand up and get all defensive. So I got some good video of that one and set off again. I saw 3 more on the road. I knew that we had tarantula's here in Utah, but I had no idea where they were, or how many there must be. Scary!
So here is the video. I added some of the flight video as to not scare you too badly. Watch in 1080p if you aren't scared at all.
As always, this was shot with Canon 5D Mark III, Magic Lantern Video Raw (14bit), 24fps, DJI Phantom with GoPro Hero 3 attached to Zenmuse H3-2D, 1080P 48fps and color corrected in Adobe Premiere.
Sunday, August 25, 2013
Sundance ski resort... a little piece of heaven
Hi all. One of the most amazing places here in Utah is Sundance ski resort. It is about 15 minutes up Provo Canyon. My family try to make it at least a few times a year to see the sites and take in the fall colors. While the leaves haven't changed yet, I could definitely see signs of colors coming. (photos of last year below)
While they don't have any cool amusement types of rides like Park City, they do have amazing scenery, food, drinks, biking, hiking, and just about anything outdoors that you could want. They also do weddings, company parties, family get-togethers and everything in between. They also keep the ski lift running to take people up on top of the mountains! Some of the hikes that they recommend also start at the top of the mountain. Even if you are just looking for a little refreshment while traveling in the area, Sundance is great place to stop in for a treat.
I gotta say, I have been kicked out of a lot of places trying to shoot some aerial shots with the quadcopter. Some really stupid places that had no real reason other than just "no". I was approached by a security guard at Sundance and I thought for sure that this was going to be just another "no" type of place... To my utter surprise, he actually pointed me to a open area that I could use and film to my hearts desire. He not only said "YES", but helped me out! Awesome place, awesome staff. Thank you for your hospitality Sundance!

click for high res version
Wednesday, August 21, 2013
Timelapse of clouds... what you don't see with the naked eye
Hi all. I spent some time yesterday taking some up close and personal video of the amazing clouds that are going on here in the Wasatch Front. Luckily, I still had A's lens... the amazing 70-200, mixed with the 3x Zoom factor that Magic Lantern allows for in RAW mode. It turns this lens into a 600mm lens at F2.8. I let it run for quite a while to capture all of the movement and beautiful billowing that is amazing to watch... especially when you then speed it up in post. You could do individual frames like a nighttime timelapse but it is so much easier to change the video frame rate to a slow speed (5fps) and just let the camera capture each fully raw frame. Take a look and tell me what you think.
Sunday, August 18, 2013
Wild Buffalo on Antelope Island...how close is too close?
Hey everyone. Take a look at wild buffalo on Antelope Island up-close-and-personal that I shot on Saturday. It was an amazing day. As I pulled across the causeway, the water was as still as a millpond. No wind at all. But then 3 minutes later, the wind picked up to about 40 Mph. Needless to say, I didn't get any aerial shots but I did get some amazing shots of the wildlife. There is one shot where the buffalo walked across the road about 15 feet in front of me. Didn't need a telephoto lens for that shot! Enjoy
If you want to see more, check out my Youtube channel at http://www.youtube.com/user/dbrentwatson?feature=watch for reviews, and amazing video.
If you want to see more, check out my Youtube channel at http://www.youtube.com/user/dbrentwatson?feature=watch for reviews, and amazing video.
AVP womens volleyball... fun, sun, sand, what more could you ask for?
As promised, here is the video compilation of yesterday's tournament up in Liberty Park, in Salt Lake City. AVP knows how to put in all together. Up close and personal with the fans, it was quite a day of beach volleyball. Enjoy Kerri Walsh Jennings in full HD quality. Music by yours truly. ESPN and CBS Sports Channel were both doing full coverage. It was also very cool that they let everyone in with great cameras, (including myself). I saw several people with full amazing camera rigs. One guy even had a slider on a tripod. I hope everyone got some great shots! Here are mine put together in a nice package.
For more videos, subscribe, if you like.
Thanks to A Palmer for the beautiful 70-200 F2.8 II lens that he let me borrow.
For more videos, subscribe, if you like.
Thanks to A Palmer for the beautiful 70-200 F2.8 II lens that he let me borrow.
Saturday, August 17, 2013
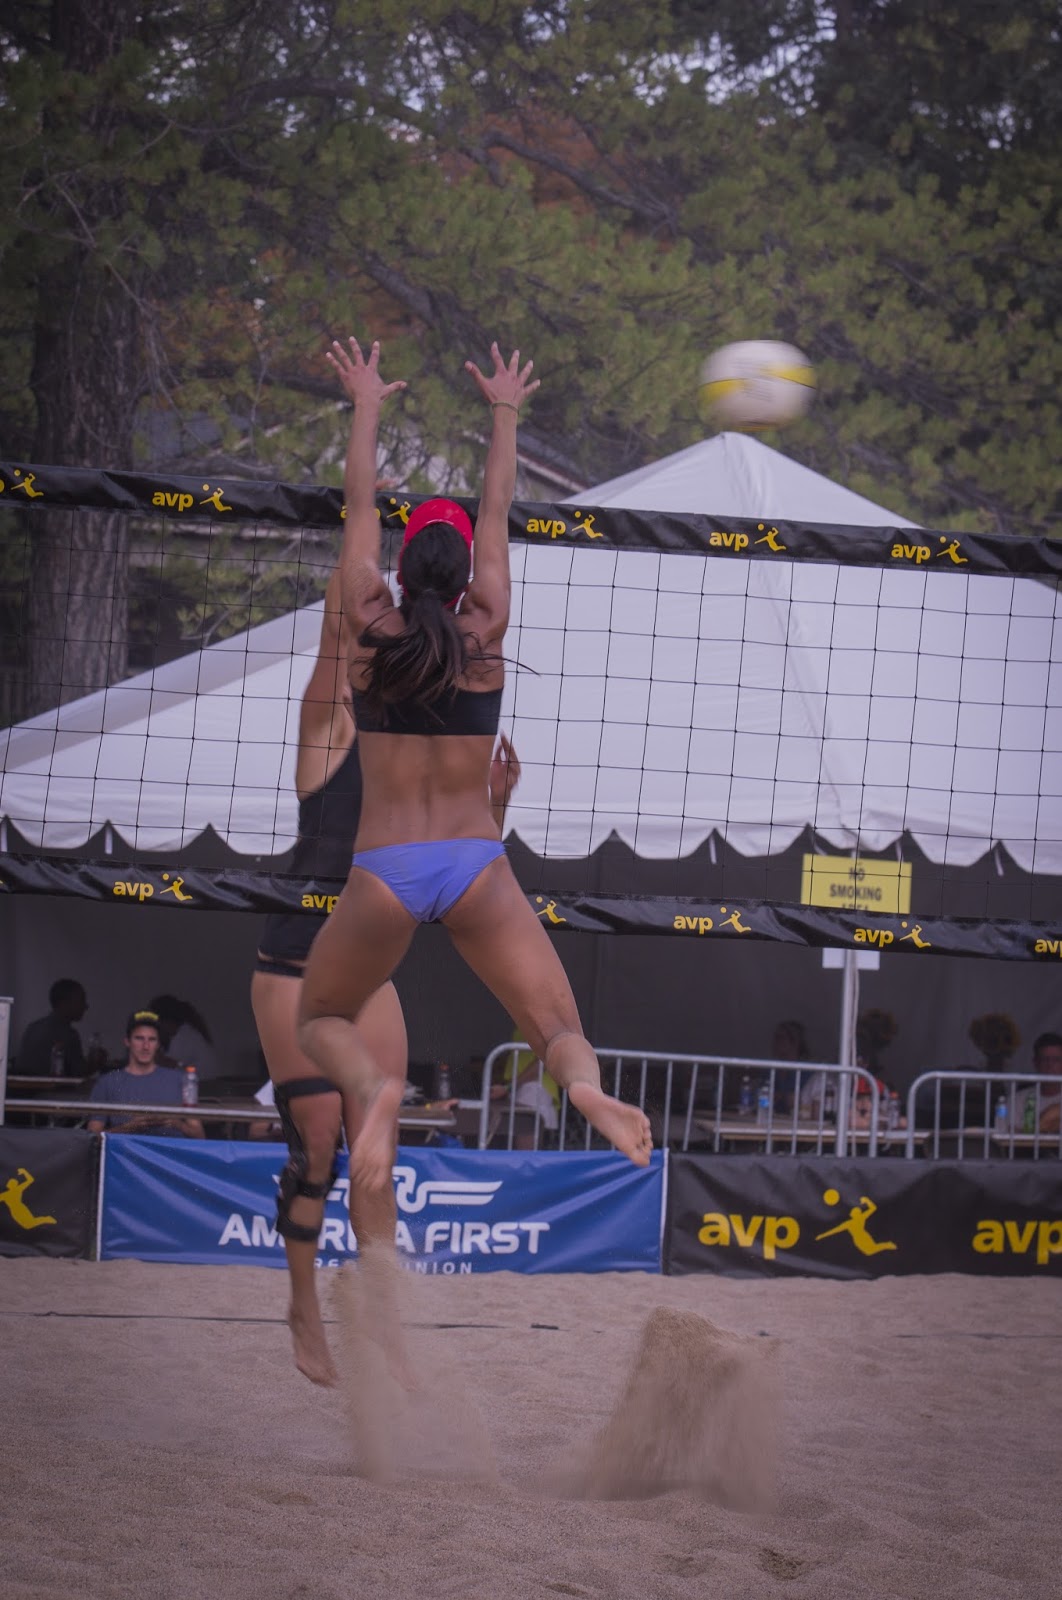
AVP womens volleyball semi-finals in SLC
So I saw the news last night about how some local women got to take on Kerri Walsh Jennings. For those of you who don't know Kerri, she was half of the Misty May and Kerri Walsh Jennings duo from the summer Olympics. Together they have won gold in 3 Olympics. So today, I stopped by Liberty Park in SLC to check out a few matches. Amazing play.
So here are a few shots from the games that were played.


 Some beautiful RAW video to follow!
So here are a few shots from the games that were played.


If you like it, share it!
Friday, August 16, 2013
Where to shoot photos in American Fork
There is a little known secret about this amazing hidden park here in American Fork. Surrounded by trees, you can't really see it from any road, but step inside and you will find one of the most amazing locations for shooting portraits and video. You have colorful rocks and stairs in the amphitheater, and then flowers and hills that make this place large enough for a huge wedding, and small enough to feel intimately close to nature. Just up the hill (as you will see in the video) is the American Fork LDS Temple. Enjoy some amazing flowers video and hidden gems in the park.
Shot with Canon 5D Mark III
Magic Lantern Firmware July 27, 2013 build
Canon 24-70 F2.8 L
ProAm DVC200 8 ft Camera Jib
Music by David Watson
Shot with Canon 5D Mark III
Magic Lantern Firmware July 27, 2013 build
Canon 24-70 F2.8 L
ProAm DVC200 8 ft Camera Jib
Music by David Watson
Sunday, August 11, 2013
How to shoot the Milky way in a time-lapse, it's harder and easier than you think
Hi everyone. I searched and search the internet for good information about how to shoot a time lapse of the milky way, surprisingly, I didn't find a whole lot of useful information. Sure people are willing to share the settings on the camera, but to find the secrets of where to shoot, and how to shoot.
The next thing to check is the weather, check it here. Make sure you check the cloud cover and the movement of the clouds at least a few hours before you go out somewhere. You need the sky to be clear and you also need to know how much wind. The reason for this is not only clouds, but the wind can kick up a lot of dust. If there is a storm front coming in, chances are pretty good that along with that storm will kick up dust.
Ever here of light pollution? Most of the time, if you live near any sort of city, you are going to have light pollution. This is caused by all the lights that we keep on at night that end up reflecting and bouncing all over the place. To find a place near you that has a dark enough sky, search here.
Ok, now we need to talk about equipment. You need a camera, preferably a DSLR, with the ability to shoot long exposures. How long? 10-30 seconds. Most DSLR cameras can shoot up to 30 second shots in any mode. You also need a wide angle lens. The reason for this is because stars move. If you zoom into a part of the sky, that smaller location will move more than looking at a whole lot of the sky with a wide angle lens. You need a tripod and it needs to be stable. The next thing is a intervalometer. This is a device that will take a series of pictures at a specific interval. I use Magic Lantern firmware which puts this capability in the camera.
That's it really. There are lots of other equipment that can be used, but you don't need those things to take a good timelapse.
So I followed the steps above and this is location that I came up with:

It was far enough away to get out of most of the light pollution for my area and away from any traffic and close enough to drive within a couple hours. The moon rise was 10:00 am so I didn't have to worry about the moon getting in the way, and the weather was mostly clear. Because this is a timing thing that only happens every once in a while, I was willing to risk having a few scattered clouds.
I set the camera up, pointed at the horizon, and manually focus the camera. Focus can be the most tricky part of setting up. I usually end up turning on video mode, or live preview, and then pointing the camera at a star that is bright, and then manually adjusting focus so that the star is focused. You may have to increase the ISO settings to above 3200 in order to really have the camera be able to "see" the stars. If the stars are not bright enough, then you may have to resort to pointing at a man made light out in the distance to set the focus.
Next thing to setup is you camera settings. Here are the ranges that you will want to test with:
Camera Manual mode
Lens: Turn off Autofocus
Lens width: 11mm - 24mm (depends on crop or full frame camera)
ISO: 1600-6400
Shutter speed: 10-30 seconds
Aperture: F2.8 - F5.6
Intervalometer: Every 1-10 seconds (depends on how fast the shutter speed is)
Set the picture style to Faithful
Set the White Balance to 3200 K. Do not leave it on Auto White Balance.
So take some test shots. Keep the ISO as low as you can, but capture as much light as you possibly can. Try ISO at 1600, Shutter speed at 25 seconds. In the camera preview mode, just remember that in really dark environments that the screen will look a lot brighter than the actual photo (or video frame).
Obviously keeping the camera still is assumed. If you have a lot of wind, you may want to make sure that you tripod is sufficiently weighted down to resist any movement.
That's it for the shooting part. In my next blog post I will go over how to process the frames into a video.
My guide to shooting night time time-lapse
There are several things that have to come together before you try to go out and shoot. The first is the phase of the moon. You need the moon to not be out. You can check the sunrise and sunset of the moon by your location at this site.The next thing to check is the weather, check it here. Make sure you check the cloud cover and the movement of the clouds at least a few hours before you go out somewhere. You need the sky to be clear and you also need to know how much wind. The reason for this is not only clouds, but the wind can kick up a lot of dust. If there is a storm front coming in, chances are pretty good that along with that storm will kick up dust.
Ever here of light pollution? Most of the time, if you live near any sort of city, you are going to have light pollution. This is caused by all the lights that we keep on at night that end up reflecting and bouncing all over the place. To find a place near you that has a dark enough sky, search here.
Ok, now we need to talk about equipment. You need a camera, preferably a DSLR, with the ability to shoot long exposures. How long? 10-30 seconds. Most DSLR cameras can shoot up to 30 second shots in any mode. You also need a wide angle lens. The reason for this is because stars move. If you zoom into a part of the sky, that smaller location will move more than looking at a whole lot of the sky with a wide angle lens. You need a tripod and it needs to be stable. The next thing is a intervalometer. This is a device that will take a series of pictures at a specific interval. I use Magic Lantern firmware which puts this capability in the camera.
That's it really. There are lots of other equipment that can be used, but you don't need those things to take a good timelapse.
So I followed the steps above and this is location that I came up with:

It was far enough away to get out of most of the light pollution for my area and away from any traffic and close enough to drive within a couple hours. The moon rise was 10:00 am so I didn't have to worry about the moon getting in the way, and the weather was mostly clear. Because this is a timing thing that only happens every once in a while, I was willing to risk having a few scattered clouds.
Setting up
You need to find a location that has some amount of the earth in the shot. You need this because without reference to something on the ground, it is hard for anyone watching to really see the amount of movement that is going on. Also, because you are going to be shooting at a large aperture value (i.e. 2.8), you need to make sure that anything that is closer to you (like trees or bushes), isn't so close that you lose focus on the stars because of the depth of field. Some of the more advanced shooters will increase the F-stop to allow for a larger depth-of-field to allow for this very thing. You will then have to either increase the ISO, of increase the shutter speed to account for this.I set the camera up, pointed at the horizon, and manually focus the camera. Focus can be the most tricky part of setting up. I usually end up turning on video mode, or live preview, and then pointing the camera at a star that is bright, and then manually adjusting focus so that the star is focused. You may have to increase the ISO settings to above 3200 in order to really have the camera be able to "see" the stars. If the stars are not bright enough, then you may have to resort to pointing at a man made light out in the distance to set the focus.
Next thing to setup is you camera settings. Here are the ranges that you will want to test with:
Camera Manual mode
Lens: Turn off Autofocus
Lens width: 11mm - 24mm (depends on crop or full frame camera)
ISO: 1600-6400
Shutter speed: 10-30 seconds
Aperture: F2.8 - F5.6
Intervalometer: Every 1-10 seconds (depends on how fast the shutter speed is)
Set the picture style to Faithful
Set the White Balance to 3200 K. Do not leave it on Auto White Balance.
So take some test shots. Keep the ISO as low as you can, but capture as much light as you possibly can. Try ISO at 1600, Shutter speed at 25 seconds. In the camera preview mode, just remember that in really dark environments that the screen will look a lot brighter than the actual photo (or video frame).
Taking the sequence of shots
So now set the Intervalometer to take a picture every (shutter speed) + 1 second. The length of the video will depend on how many shots you take. Remember that every frame is only 1/24th or 1/30th of a second in video. So for a 10 second video, you need 240 shots. If you are taking 2 shots a minute, you need to shoot roughly 2 hours worth of shots. This also may depend on the capabilities of your camera, but most should be able to handle it. If you are using Magic Lantern on a Canon camera, this will work. I have tried using long exposure noise reduction and because it take quite a bit of time to process each frame in camera, I don't recommend it. You can do better noise reduction in post.
Obviously keeping the camera still is assumed. If you have a lot of wind, you may want to make sure that you tripod is sufficiently weighted down to resist any movement.
That's it for the shooting part. In my next blog post I will go over how to process the frames into a video.
Monday, August 5, 2013
Cascade Springs - Utah Mountains Video Shoot
I spent last Friday shooting the beautiful mountains of Utah. Traveling up American Fork Canyon, over the Alpine Loop, there are a couple of amazing reservoirs and an amazing mountain spring called Cascade Springs. If you are ever in the area, you should visit here. You can also stop by the famous Sundance Ski Resort for some fine dinning any time of year. Enjoy.
I shot with my Canon 5D Mark III, with Magic Lantern Video RAW. The dynamic range is amazing! Should have brought my variable ND filter along to slow some of the water shots but otherwise it was very exciting.
I shot with my Canon 5D Mark III, with Magic Lantern Video RAW. The dynamic range is amazing! Should have brought my variable ND filter along to slow some of the water shots but otherwise it was very exciting.
Sunday, July 21, 2013
Audio Technica PRO88W-830-24 battery powered wireless transmitter and receiver in-depth review
Audio Technica PRO88W-830-24 Pro 88W Wireless Microphone
So you are thinking about wireless audio options for Canon DSLR
Reasons that I thought about buying…
So if you have watched my review on Zoom H4N, you know that using a separate Audio recorder is probably the way to go for capturing high quality audio. The next problem that I ran into is being able to record audio from a distance without running a wire and carrying around a microphone. The main things that I needed were the ability to run on batteries and keep the weight down as low as possible. I looked at the options with Sennheiser and some of other lower cost options. As you can tell from my other reviews. I tend to try and save as much money as I can. I want the quality and features but at the lowest cost. Even though I read several reviews on this product, I thought that for my needs, it would work out.
Here is what I actually use it for.....
I found that for interview and training types of videos, I use this as the main input for mic'ing and ultimately sending the audio into my Zoom H4N. If I want the flexibility of moving around, without moving a mic, I use this a lot. I will typically mount the zoom on top of the hot shoe on top of the camera and then mount the receiver to the bottom of the Zoom. This doesn't cover all things and the one area that I am lacking is news interview style where I use a lav mic for myself and a handheld for people I want to interview. Because of this, I haven't done any of this style of interviewing. Just as well because it really requires multiple people for a camera man and talent. I did my research to compare multiple systems and although the Audio-Technica is not the best, the distance that I typically shoot works alright.
Here are the things I didn't expect or didn't like...
I didn't expect the audio quality to be great, but I didn't expect the level of noise that is introduced because of the radio signal. I also didn't expect the level of radio interference that can happen at really short distances. Computer equipment, some lights, cell phones, all of these things can disrupt the signal. And not having the option to change the signal beyond an A/B switch is not enough to get to the best possible clear signal. I have found that when I shoot around lots of computer equipment, cell phones, walls, and other interference, I have to test and move the position of the receiver a lot. This is not a fun process. I typically have to be within a few feet in order to keep the signal from being static ee. In open air though, across 30 feet, it does pretty well.
Here are the super cool things that I love about it...
I love not being tethered to the camera, once I find the right (non-interference spot), turning on all the signal chain and the camera and then knowing that it will work. I haven't had any problems with cables, or even the mic, although I haven't ever stretched to any heat or cold limitations. The batteries last quite a while, several hours, without worry. Just don't forget to turn it off. For the price, it was a good purchase. For the amount of headache of checking for interference, and doing takes that end up screwed up because of signal interference, I can't really recommend this product. If you want rock solid and flexibility, it looks like spending the extra money is well worth it. I will be upgrading to a the Sennheiser system for the future.
Common settings that I use...
Only has an A/B switch for channels
Levels can be adjusted but I never have from out of the box.
Wednesday, July 10, 2013
Swivi 5.6 External Monitor for DSLR in-depth review
So you are thinking about buying a Swivi 5.6 external monitor for your DSLR Camera?
Reasons that I thought about buying…
If you have watched my review on the Canon 7D or the Canon 5D Mark III, you know that one of the hard things about using a DSLR for video is focus. I went down the path of getting a viewfinder that attaches to the back of the camera in my review of my viewfinder. With that review, I also talked about how it exposed the quality of the LCD quickly becomes the issue of being able to really see focus. I also found that watching things back on the same small 3 inch LCD. especially when I was trying to share the video with those around me became a huge issue. So for shooting things that I wanted the ability to see focus, as well as play things back, I needed something that would be large enough and of course battery operated. Along came the Swivi... I read several reviews of people who got pre-release over at Cheesycam and Oliviatech who liked what they were seeing. I also found the price to be within reach. Honestly at the time, I didn't understand focus peaking but it seemed like this would be something that would come in very handy. It really really did make a huge difference to be able to see where the focus really was.
Here is what I actually use it for.....
I have found that this is very useful for almost every situation shooting video. The Swivi attaches to the camera mount at the bottom of the camera and swivels either to the side or just overlays the back of the camera. I found the resolution to be a huge jump from the LCD of the back of the 7D. When I take it out in public, people tend to be in awe of it, and other photographers tend to be jealous of it. The monitor sun hood comes in very handy when trying to deal with blocking the sun. Obviously, this is not an super bright LCD or OLED screen, so being able to see in direct sunlight is a must. Also being able to attach the sunhood in either direction gives some great flexibility. It is plastic so the durability is worry some. I have been very careful with being hard on it. I have always left it behind when shooting on hiking shoots. The focus peaking that is built into the monitor is pretty good. I have seen other high end monitors that do a much better job, but it is very useable. Indoor shots are usually the ones where I use it the most.
Here are the things I didn't expect or didn't like
So probably the biggest problem that I have had is getting it to stay tightly connected and not swivel when attached to the camera. The wheel that allows you to screw to the mount at the bottom of the camera takes a lot of force to get a tight enough fit to really stay put. I have found that pulling the right edge up against the camera is the only way to really make it not swivel on the 7D. For what ever reason, this didn't seem to be the case with the 5D Mark III. The other strange thing that I noticed is that if I leave a battery in, which it takes the same LP-6 (the video says EP-6, whoops) Canon battery as the camera, it will actually drain the battery within a day or so. Even if the monitor is not turned on, it seems to suck battery power. My fix for this is to always place the battery that I am using in upside down when not in use. This way it doesn't drain the battery. The power button is a little strange as well. Turning it off takes holding it down for a full second or two before it powers off.
The color reproduction is good. Good enough that I rarely find enough color difference between the back of the camera and the monitor, although there is some. Brightness is good as long as you are not in direct sunlight. The sunhood helps but it isn't quite enough to really see well in that much sun. Sunsets work well though. Bootup time isn't great. It does take a while before the camera recognizes the signal and switches to the monitor. Some of that is the camera though. It has a button that allows it to go full frame or cropped. It is mostly useless on the 7D. The menu and rocker wheel to select and modify settings like brightness and contrast works well enough. Swiveling the monitor feels like you might break it off. The fact that it is made of plastic makes it feel cheap but as long as you don't twist it the wrong way, you should be fine. When it is not rotated, and even when it is, access to the buttons on the left side of the screen are hard to get to. But, access to the scroll wheel on the right is. So recording is easy, but playing back is not because the play button is on the left side.
Here are the super cool things that I love about it
I have to say that it was really nice to be able to see a level of detail that I could not see just looking at the back of the camera. The resolution bump from the LCD of the back of the camera to this monitor is enough that it adds a huge value. Having the focus peaking available, at least before Magic Lantern started working on a 7D, was worth the money alone. For the price, this was a great addition that allowed me to step up to a level of cinematography that I expected. The fact that it uses the same batteries for me was a huge plus. It meant that all my power options were sharing the same type, so in a pinch, I could swap things around if needed.
I like the ease of mounting and the cable that is rotate-able to prevent it from getting messed up by rubbing or pushed sideways. I have also gotten several adapters and a longer HDMI cable to be able to mount on a jib/crane away from the camera. Although it doesn't help with being able to remotely focus the camera, it does help to be able to see the shot as you are shooting from the back of the crane.
Let me know what you think. Send a comment.
Zoom H4N in-depth review
So you are thinking about getting an audio recorder for Canon DSLR with the Zoom H4N
Reasons that I thought about buying…
So if you have watched my review on Canon 7D here, you know that using the on-camera mic is not great. I knew that I needed to add-on to the camera to allow for better audio recording. I read review after review of people discussing an on-camera mic, but I really wanted the added flexibility of multiple channels of audio. I wanted to be able to plug-in multiple mic's for field recording and I wanted it to be simple. Funny story, I actually got my wife to agree to getting it because she was a big fan of Ghost hunting. I told her that she could use it as a great EVP recorder. Turns out, it's a horrible EVP recorder, because of it's high quality, the chances of "interference" causing "unknown" sounds to be recorded is pretty low. That being said, the Zoom H4N has become the de-facto standard of off camera audio recording. There are many imitators out there, and even Zoom is trying to up-sell people to the new Zoom H6N that is about to be released. But the abilities of this little recorder make it flexible enough to do just about anything.
Here is what I actually use it for.....
I use this as the main input for mic'ing and ultimately sending the audio into my camera. The nice part of this is that I can record multiple mic inputs at the same time either on multiple channels or just from the x/y stereo mic on the zoom. I will typically mount the zoom on top of the hot shoe on top of the camera if I am running and gunning or shooting an event like sports or concert type events. It captures the stereo field rather nicely, and also has the ability to set limiting and compression for those moments that you want the maximum audio signal that you can. In more advanced setups for interviews or training videos I usually run a separate condenser mic in order to get closer to the subject. Originally, even though you could have this as a recorder, plugging into the Canon 7D directly out of the Zoom required a intermediate device or cable in order to cancel out the AGC from the 7D. I bought a JuicedLink device to have the signal on half of the stereo channel to max out in order to allow the signal be controlled on one channel. Now with the latest 2.0 firmware for the 7D, you just need to set the levels in the camera to Manual and then make sure the levels in the camera are set to not peak, and in the Zoom both the record level and the headphone out level so that the camera does not peak out anywhere along the audio chain.
Here are the things I didn't expect or didn't like...
Learning the menu system and learning the different options in the Zoom can take some time. Recording multiple inputs at the same time with multiple mic's can be a bit tricky. The Zoom also has updated the firmware to allow for setting input levels while recording multiple sources. I highly recommend updating if you want to do multiple mic setups. The biggest surprise was when I accidentally tipped my camera bag over into a river at the top of a waterfall. The Zoom went off the 100 foot waterfall and survived the fall, not even a scratch on it. I did the bury it in rice for a couple of days trick to get the water out. And to my surprise, it worked. Even the microphones sound no worse for wear. I have used the Zoom in meetings, concerts, interviews, and in cold and hot weather. It just works. I haven't come across any flaws that I can find. The only thing that I had to do is get a fuzzy wind screen. The foam screen that comes with it doesn't help with wind. When shooting with the camera I typically don't even record on the Zoom, I just turn on Monitoring (in settings) and go directly into the camera. If you want to monitor with headphones, then you need a splitter cable for coming out the headphone out.
Here are the super cool things that I love about it...
If you are going to get serious about shooting video with a DSLR, you are going to need some way to get quality audio with the video. The Zoom makes this possible with a portable, quality audio, at 24bit 96Khz. I love my Zoom and would replace it immediately if it ever got lost or broke. Because it is so portable, and the battery life is very good -- about 4-6 hours of continuous recording, taking on a shoot is a no-brainer. I am going to look seriously at the Zoom H6N. The added flexibility for the 6 channels and the different on-board mic options is a very nice set of added features. I would highly recommend this piece of equipment for anyone trying out film-making. It has about every feature you could ever want from a portable and high quality audio reproduction.
Common settings that I use...
Record Settings, 24 bit WAV, mp3 variable
Input Monitoring On
Record levels
Headphone out levels
Camera settings Manual levels
Multiple microphones attached
Subscribe to:
Posts (Atom)